Mountain Bike Brake Pads: How to Choose, Install & Maintain
Brake pads are one of the most essential components on your mountain bike. They’re not just about stopping — they define control, feel, and confidence.
Whether you ride Trail, Enduro, Downhill, or eMTB, this comprehensive guide explains the key differences in brake pad materials, compatibility, maintenance steps, and troubleshooting — so you can ride every descent with confidence. Ride Fearless.
Mountain Bike Brake System Overview
To understand brake pads, you first need to understand the system they work within. Mountain bikes typically use two types of disc brake systems:
- Mechanical Disc Brakes
Cable-actuated and simple to service, but they offer a stiffer lever feel with less modulation. - Hydraulic Disc Brakes
Fluid-driven calipers deliver smoother response and stronger, more consistent braking performance, making them the dominant choice for modern mountain bikes.
Brake Basics: Power, Feel, and Modulation
To choose the right pads, it helps to understand the three key performance metrics:
Braking Power
Refers to how effectively a brake system can slow the bike down or bring it to a complete stop. It’s not just about maximum force, but about maintaining reliable deceleration under speed, heat, and rider load.
Brake Feel
Describes how the brake responds at the lever. A good brake feel allows riders to control speed smoothly without sudden or unpredictable reactions.
Modulation
The ability to precisely control braking force throughout the lever pull. Better modulation helps maintain traction and confidence on technical terrain.
Braking Needs by Riding Style
Each riding style demands different braking characteristics:
- XC (Cross-Country): Lightweight setup and smooth lever feel.
- Trail / Enduro: Prioritizes heat resistance and stable braking performance over long descents.
- Downhill: Focused on maximum braking power and efficient heat management.
For a deeper dive into specific setups, check out our Shimano Enduro vs. Trail series overview to see how components align with these styles.
Brake Pad Material Comparison
The compound of your brake pad directly affects braking power, modulation, and noise. Here’s how the most common materials compare:
| Material | Characteristics | Ideal Terrain |
|---|---|---|
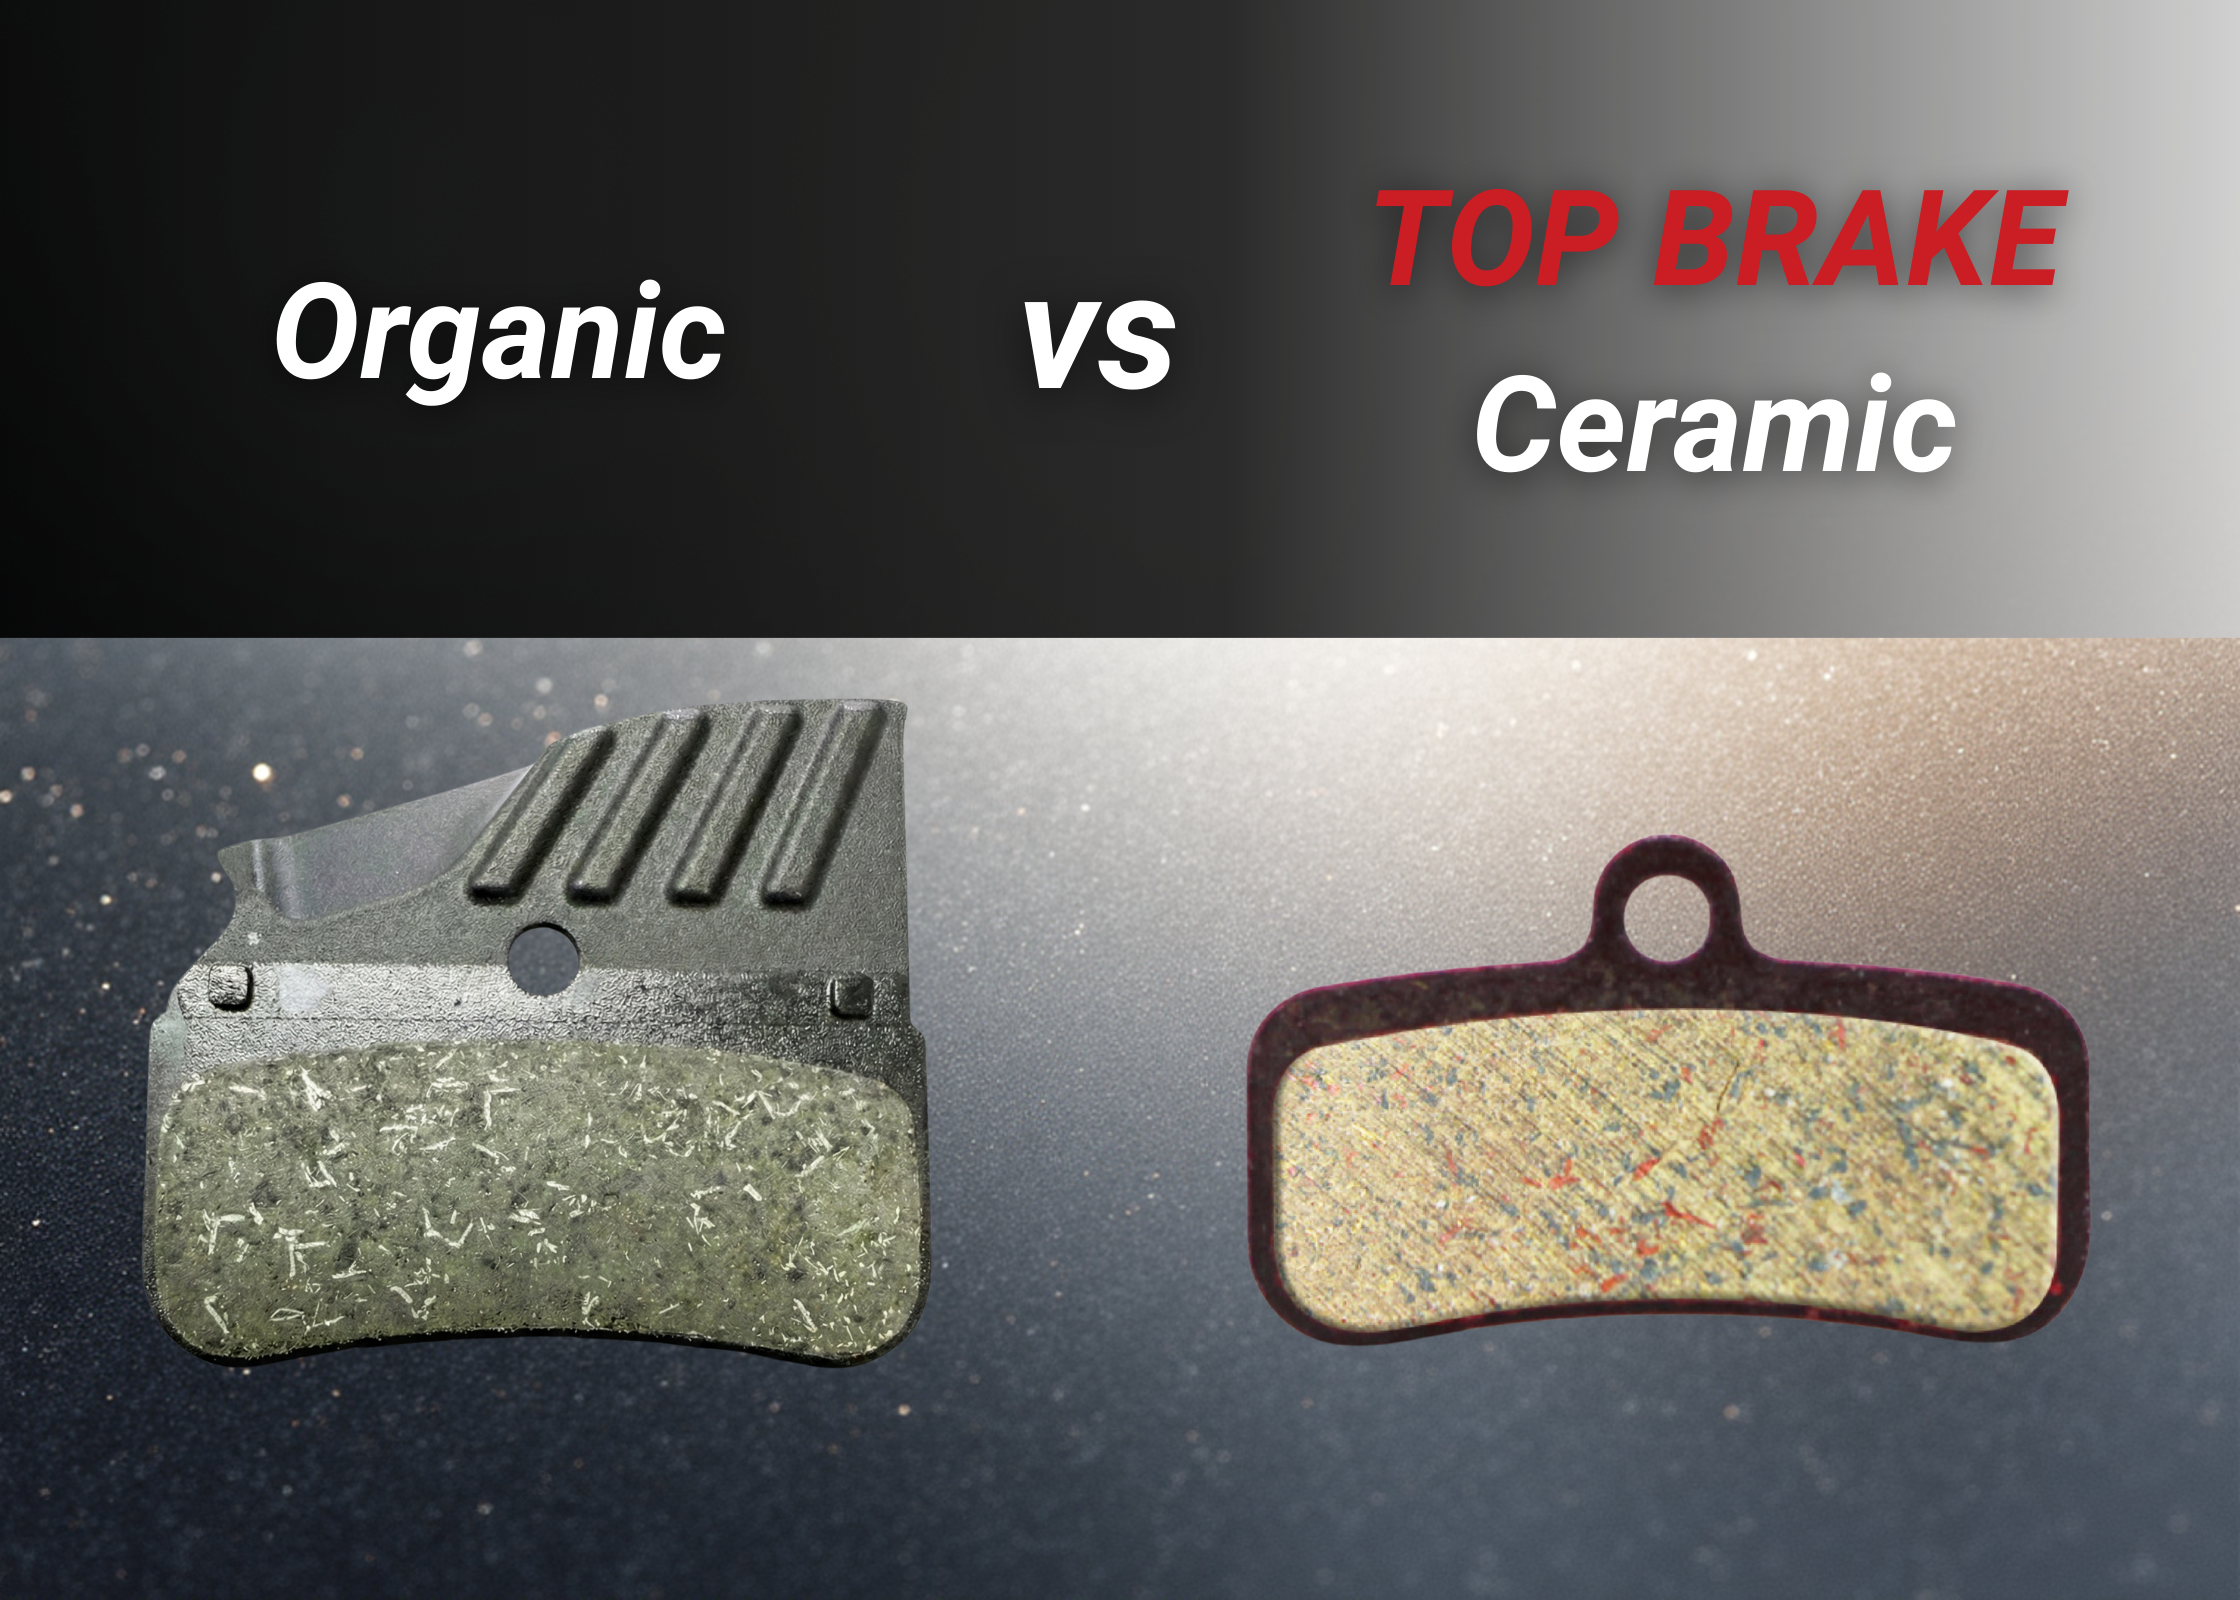
| Organic | Smooth lever feel, quiet operation, shorter lifespan | XC / Trail |
| Ceramic | Stable at high temperature, low dust, medium wear rate | Trail / Enduro |
| Semi-Metallic | Organic base with metal powder; strong braking, slightly louder | Trail / All-Terrain |
| Metallic / Sintered | High braking power, heat-resistant, long lifespan, louder under load | Enduro / Downhill / eMTB |
| E-Bike Compound | Kevlar-reinforced composite for e-MTB torque & heat; long lifespan, consistent performance | eMTB / Enduro / Long Descents |
| Graphene Composite | Excellent heat dissipation, rotor-friendly, long lifespan | All-terrain / Long Descents |
Both Metallic and Sintered pads belong to the metal compound family. Note that while often used interchangeably, strictly speaking, “Metallic” refers to the ingredients, while “Sintered” refers to the manufacturing process.
If you are debating between compounds, read our detailed comparison on Organic vs Ceramic Brake Pads. For those seeking maximum performance, see our Sintered vs Graphene comparison.
How to Choose the Right Brake Pads
Choosing the right brake pads isn’t just about material. To avoid compatibility issues and achieve the braking performance you expect, it helps to follow a clear and practical order.
1. Confirm Brake Pad Shape and Size (Most Important)
The most common mistake when choosing brake pads isn’t selecting the wrong compound. It’s choosing pads that don’t match the caliper shape. Even within the same brand or brake series, different calipers may use different pad shapes and dimensions.
Pro Tip: Remove your current brake pads and compare their shape and size directly with the compatible models listed on the product page. This remains the most dependable method in real-world use.
2. Choose Material Based on Riding Conditions
Once fit is confirmed, refer to the comparison table above to match the material to your environment:
- Dry conditions & General Riding: Go for Organic or Ceramic. They offer quieter operation and smoother control, perfect for XC and Trail.
- Long Descents, Heavy Loads, or Mud: Choose Metallic, Graphene, or High-Temp Composites. These provide superior heat resistance and consistency for Enduro and Downhill.
3. Choose Based on Braking Feel and Control Preference
Finally, decide how you want the lever to feel:
- For a smooth, linear feel: Stick with Organic, Ceramic, or Graphene.
- For a strong initial bite & firm feedback: Opt for Semi-Metallic or Metallic (Sintered).
Choosing the right braking feel directly influences confidence, control, and how comfortable you feel pushing the bike on demanding terrain. If you need a more granular walkthrough, see our comprehensive guide.
Ready to find your match? Check your brand compatibility:
| Brand | Common Calipers | Find Your Pads |
|---|---|---|
| Shimano | Deore, XT, XTR, Saint | Find Your Shimano Pads Now |
| SRAM | Code, G2, DB8 | Find Your SRAM Pads Now |
| Magura | MT5, MT7 | Find Your Magura Pads Now |
| Tektro / TRP | HD-M285, Slate, DH-R EVO | Find Your TRP Pads Now |
eMTB Section: Brake Recommendations for Electric Mountain Bikes
eMTBs are heavier and generate more heat under braking. Understanding the physics behind eMTB braking is crucial, as standard organic pads often fade on long descents.
Therefore, using eMTB-specific brake pads—like E-Bike Compound or Graphene Composite—is essential for sustained braking power and safety.
TOP BRAKE Pad Series Overview
| Series | Color | Material | Key Features | Best For |
|---|---|---|---|---|
| Performance | Red | Ceramic Compound | Fast bed-in, refined lever feel, clear braking response | Trail / All-Mountain / Technical |
| Premium E+ | Gold | E-Bike Compound | High heat resistance, durability, stable under sustained heavy load | Downhill / Enduro |
| GraphEx | Green | Graphene Compound | Low vibration, quiet control, rotor-friendly, long service life | All-terrain MTB / eMTB |
E-Bike Compound is TOP BRAKE’s high-strength composite formula made with Kevlar fibers and copper powder, tuned for the higher weight and temperature demands of eMTBs. Unsure which color fits your ride? Check the full series comparison.
Brake Pad Replacement & Maintenance
Replacing your brake pads is simple and one of the best ways to restore braking performance.
Basic Steps:
- Remove the old brake pads by taking out the retaining pin or clip.
- Fully retract the pistons into the caliper using a plastic lever or piston press tool to ensure clearance for the new pads.
- Clean the caliper and rotor with isopropyl alcohol or a disc-brake-specific cleaner. Avoid cleaners with oil/silicone.
- Install the new pads and ensure the spring clip faces the correct direction.
- Squeeze the brake lever several times to align the caliper and check for rotor rubbing.
- Perform the bed-in process (Crucial!): Apply 10–15 controlled stops from moderate speed to evenly mate the pad surface to the rotor. Do not skip this. (See our complete bed-in guide for the exact technique).
If the pistons don’t retract smoothly, it may indicate dirt buildup or worn seals.
Troubleshooting: How to Fix Squeaky Brakes & Overheating
Part 1: Squeaky Brakes (Noise)
Common Causes:
- Contaminated rotor or pad surface (oil, grease, or spray).
- Misaligned caliper causing uneven contact.
- Glazed pads due to improper bed-in or overheating.
Quick Solutions:
Start by cleaning the rotor with Isopropyl Alcohol. If the pads are glazed, lightly sand the surface to expose fresh material. If the caliper is misaligned, loosen the bolts, squeeze the lever to self-center, and re-tighten. For stubborn sounds, follow our step-by-step guide.
Part 2: Overheating (Brake Fade)
Common Causes:
- Dragging the brakes continuously on long descents.
- Using pads not rated for high temperatures (e.g., Organic pads on DH tracks).
- Rotors are too small for the rider’s weight or speed.
Quick Solutions:
Practice “intermittent braking” (brake hard, then release) to allow airflow to cool the system. If fade persists, upgrade to our Premium E+ or GraphEx Series pads for better heat resistance, or consider installing larger rotors to dissipate heat more efficiently. Learn more about brake pad heat management and the signs of overheating.
Brake Fluid Basics
What is brake fluid?
Brake fluid is the hydraulic medium that transfers force from the brake lever to the caliper pistons. Because brake fluid operates under extreme conditions, its properties play a critical role in overall braking performance and system reliability.
Mineral oil vs DOT fluid
Mineral oil and DOT brake fluid are two different types of hydraulic fluid. Since their chemical properties differ, they should never be mixed.
Common Brand Associations (and Exceptions):
- Mineral Oil: Used by Shimano, Magura, Tektro / TRP, and newer SRAM models (e.g., DB8, Maven).
- DOT Fluid: Used by legacy SRAM models (e.g., Code, G2, Guide), Hayes, and Hope.
| Type | Advantages | Disadvantages |
|---|---|---|
| Mineral Oil | Non-corrosive, non-hygroscopic (doesn’t absorb water), longer maintenance intervals | Slightly lower heat resistance, thicker viscosity (softer lever feel) |
| DOT Fluid | Higher boiling point, sharper lever response | Absorbs moisture easily, requires more frequent replacement, corrosive to paint |
💡 Note: Check Before You Buy
Quick Tip: Check your Master Cylinder Cap before adding fluid to ensure safety.
FAQ: How often should brake fluid be replaced?
As a general reference:
- DOT Fluid: Every 12 months.
- Mineral Oil: Every 24 months.
Riders who frequently ride long descents or under heavy braking loads may require more frequent service. Always follow the specific maintenance schedule provided by your brake manufacturer.
Final Thoughts: Ride with Confidence
Every descent, every stop — it’s a balance of trust and control between you and the trail. Brake pads aren’t just components; they’re the confidence that lets you push limits.
Choose the right compound, maintain them properly, and let every ride feel powerful, stable, and fearless.
Ride Fearless. Own every trail.